kernel初探
写在前面
前年(2021.12)封宿舍的时候,闲来无聊,准备入门kernel了,但貌似是因为环境总是出问题,就转去学习异构pwn了。如今,在家荒废了三周,实在是无聊至极,又开始准备kernel的环境,但貌似一下子就成功了,记录一下,为以后查阅准备。
2023.1.24补充:之前配好的环境是在ubuntu16上,在调试驱动的时候出现了问题,gdb版本太低,需要升级gdb,两种方法,一种是更改gdb源码但我在ubuntu16上没有找到可以改源码的地方,第二种是直接编译新的gdb但一直没升级成功(菜)。于是我在ubuntu22.04上重新配置,所以会在配置环境的过程中添加些新的问题。
内核下载和编译
根据wiki给的内核下载网站,将其解压。
解压命令
unxz linux-5.4.98.tar.xztar -xf linux-5.4.98.tar
须提前安装libncurses-dev、flex、bison
如apt-get install libncurses-dev
进入linux-5.4.98目录利用make menuconfig配置内核编译选项,配置时进入 Kernel hacking -> Compile-time checks and compiler options 勾选 Compile the kernel with debug info ,便于后续调试。
安装libelf-devel、dwarves
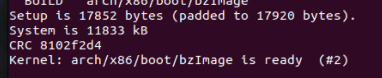
接着在linux-5.4.98目录下使用make -j3 bzImage命令编译内核镜像。见到下图所示的提示即为编译成功。
构建文件系统
下载并解压busybox
wget https://busybox.net/downloads/busybox-1.32.1.tar.bz2tar -jxf busybox-1.32.1.tar.bz2
配置: 在 Setttings 选中 Build static binary (no shared libs),将 busybox 编译为静态链接的文件;在 Linux System Utilities 中取消选中 Support mounting NFS file systems on Linux < 2.6.23 (NEW);在 Networking Utilities 中取消选中 inetd。
make menuconfig
编译
make -j3
进入解压后的busybox-1.32.1目录,利用make install创建_install目录(作为 rootfs ),进入_install目录利用mkdir -p proc sys dev etc/init.d命令创建文件夹,并编写文件名为init的脚本
1 | #!/bin/sh |
给脚本添加执行权限,并将_install目录打包为rootfs.img
chmod +x ./initfind . | cpio -o --format=newc > ../../rootfs.img打包cpio -idmv < rootfs.img解包(此处命令不需要)
至于busybox的作用,除了构建文件系统外,其他的作用我暂时还不清楚,待后续的深入学习后,再来补充。
文件组成
- baby.ko是包含漏洞的程序,一般使用ida打开分析,可以根据init文件的路径去rootfs.cpio里面找
- bzImage
bzImage是打包的内核代码,一般通过它抽取出vmlinx,寻找gadget也是在这里。 - initramfs.cpio
initramfs.cpio是内核采用的文件系统 - startvm.sh
startvm.sh是启动QEMU的脚本 - vmlinux
静态编译,未压缩的内核文件,可以在里面找ROP - init文件
在rootfs.cpio文件解压可以看到,记录了系统初始化时的操作,一般在文件里insmod一个内核模块.ko文件,通常是有漏洞的文件
.ko文件:需要拖到IDA里面分析找漏洞的文件,
启动内核
wiki上给的脚本如下:
1 | #!/bin/sh |
参数解释如下:
- -m, 指定 RAM 大小,默认 384M
- -kernel,指定内核镜像文件 bzImage 路径
- -initrd,设置内核启动的内存文件系统
-smp [cpus=]n[,cores=cores][,threads=threads][,dies=dies][,sockets=sockets][,maxcpus=maxcpus],指定使用到的核数。- -cpu,指定指定要模拟的处理器架构,可以同时开启一些保护,如
- +smap,开启 smap 保护
- +smep,开启 smep 保护
- -nographic,表示不需要图形界面
- -monitor,对 qemu 提供的控制台进行重定向,如果没有设置的话,可以直接进入控制台。
- -append,附加选项
nokaslr关闭随机偏移- console=ttyS0,和
nographic一起使用,启动的界面就变成了当前终端。
也可以利用如下脚本:
1 | qemu-system-x86_64 \ |
驱动编写调试与加载
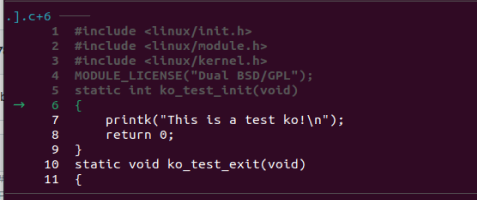
驱动代码如下,为.c文件:
1 | #include <linux/init.h> |
同一目录下编写Makefile:
1 | #要与驱动.c文件同名即first_kerneltest.c |
这里简单介绍一下这个 Makefile
obj-m指定要声称哪些模块KDIR用来标识内核源码目录,提供驱动编译所需环境$(MAKE) -C $(KDIR) M=$(PWD) modules-C表示进入到指定的内核目录M指定驱动源码的环境,M 并不是 Makefile 的选项,而是内核根目录下 Makefile 中使用的变量。这会使得该 Makefile 在构造模块之前返回到 M 指定的目录,并在指定的目录中生成驱动模块。
最后make编译驱动即可。
加载驱动
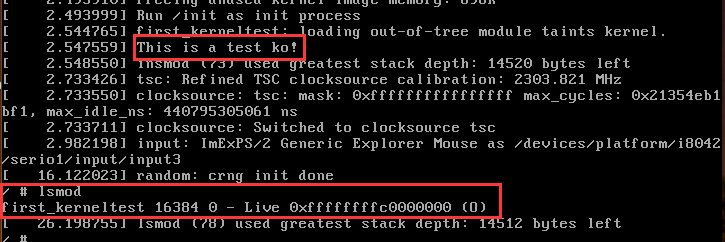
将生成的.ko文件复制到busybox的_install目录下并对init(启动脚本)修改如下:
1 | #!/bin/sh |
重新打包rootfs.img并启动qemu,加载成功
调试
使用root权限调试(上文提及),使用如下命令调试
1 | qemu-system-x86_64 |
另起终端,执行命令 gdb -q -ex "target remote localhost:1234" 即可
执行后如下,会发现有些命令无法执行

解决方案:使用gef-remote
关于使用gef-remote可把我坑惨了,[大佬博客]( Kernel pwn CTF 入门 | Kiprey’s Blog )写的是gef-remote --qemu-mode loaclhost:1234,由于gef的更新原因在我这却怎么也执行不了,于是查了gef手册最新的语句为gef-remote --qemu-user --qemu-binary vmlinux_path ip port在使用前一定要先set architecture
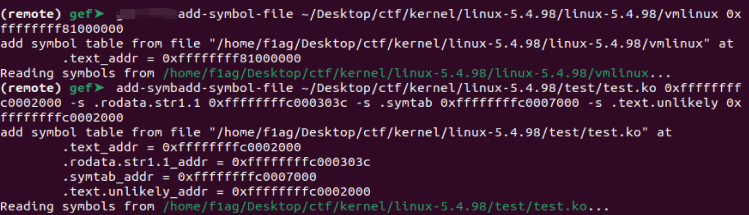
为了方便调试,可以添加一些符号文件
add-symbol-file vmlinux_path address关于address的获取及意义[这里]( [linux - The address where filename has been loaded is missing GDB] - Stack Overflow )写的很清楚,address是gdb想知道的二进制文件的.text段的加载地址,可以使用
readelf -WS ./binary获得add-symbol-file .ko addressgrep <target_module_name> /proc/modules可以获得驱动加载的基地址grep "0x" /sys/module/ko_test/sections/.*可以获得内核模块各个段的地址,加载ko的符号文件时,添加越多的段地址越好,若只有.text段的地址,可能会下断点不成功
添加完符号文件后,就可以对驱动里的函数下断点,如下

如想要断在ko_test_exit处,在qemu启动的内核shell输入rmmod terget_mode_name即可。
参考链接:
内核下载与编译 - CTF Wiki (ctf-wiki.org)
Kernel pwn CTF 入门 | Kiprey’s Blog
(71条消息) 老表带你学Linux kernel pwn 入门(一)_SiameseJuly的博客-CSDN博客_linux kernel pwn
linux kernel pwn notes - 先知社区 (aliyun.com)
gef-remote - GEF - GDB Enhanced Features documentation (hugsy.github.io)